Apart from visualizing HxDR catalog features on the map, you can add your own data to the StartApp map from local files or from files you uploaded to the HxDR Platform previously.
When you add your own content, you can upload it to the HxDR Platform in various formats, such as Reality Capture Scans (e57 files), or 3D BIM models (ifc files). The HxDR Platform processes it and presents it to you as your Assets. For each uploaded dataset, there can be a number of child artifacts, such as:
Point cloud – a point cloud mesh.
Mesh – a 3D textured mesh.
Panoramic – photospheres created from scanning position.
You can add data in formats such as geojson, kml, gml to the StartApp map, as well as HxDR asset formats, like e57, ifc, b2g, glb. The HxDR asset formats are processed by HxDR before you can add them to the application.
Add data from the UI
Add an HxDR asset
To add one of your project assets on the HxDR Platform to the map:
Slide open the Layer Control drawer by clicking the Layers icon in the left navigation bar.
Click the Add data... button at the bottom of the drawer.
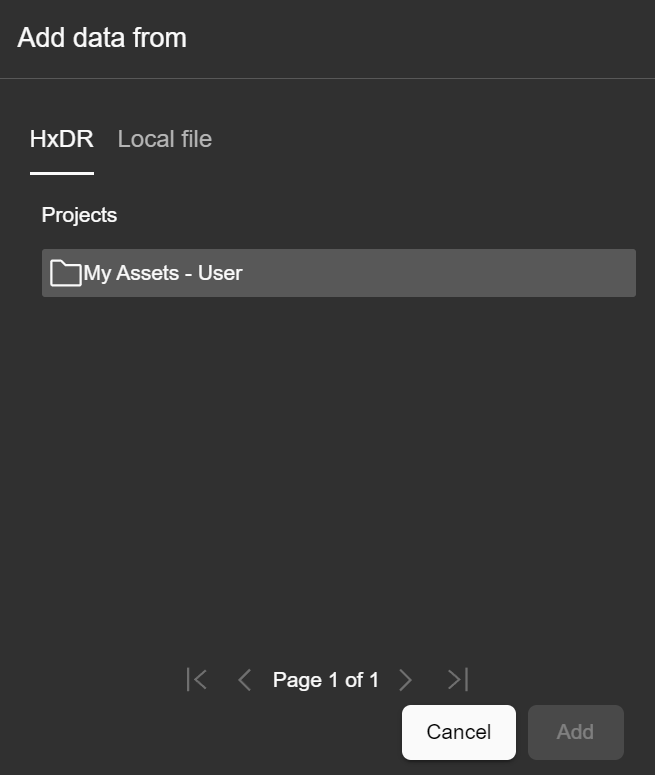
In the Add data from dialog, select HxDR.
Select an HxDR asset from a folder
Browse for the file in the My assets folder, and select it.
Click the Add button. HxDR StartApp adds the asset to the map. If the asset doesn't have a georeference, HxDR StartApp automatically opens the Geolocation drawer.
Add a local file
To add a local file to the map:
Slide open the Layer Control drawer by clicking the Layers icon in the left navigation bar.
Click the Add data... button at the bottom of the drawer.
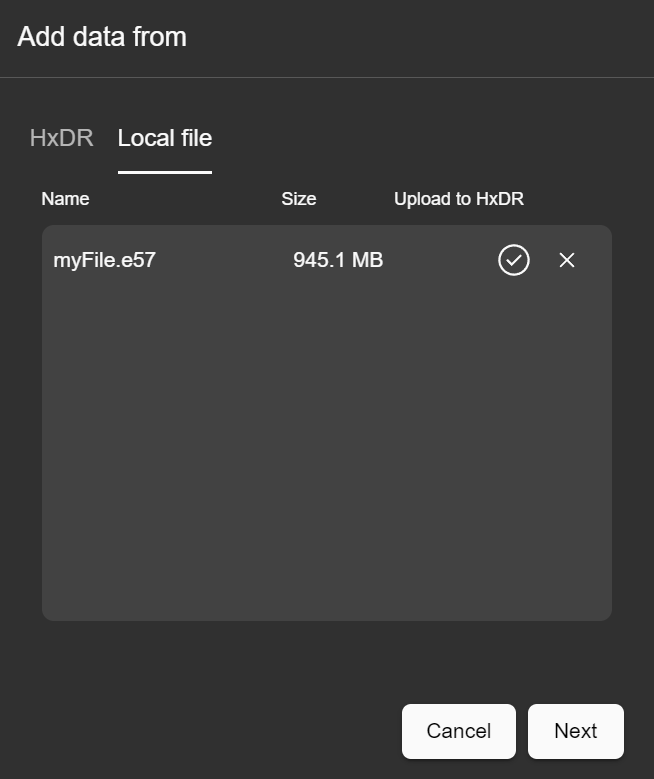
In the Add data from dialog, select Local file.
Drag and drop the file from your file system, or click in the dialog center to select the file from a file explorer. HxDR StartApp indicates if the file format requires processing to upload it as an asset to HxDR Platform.Adding local dataIf the file format doesn't require processing for upload, skip the next step, and go to step 6.
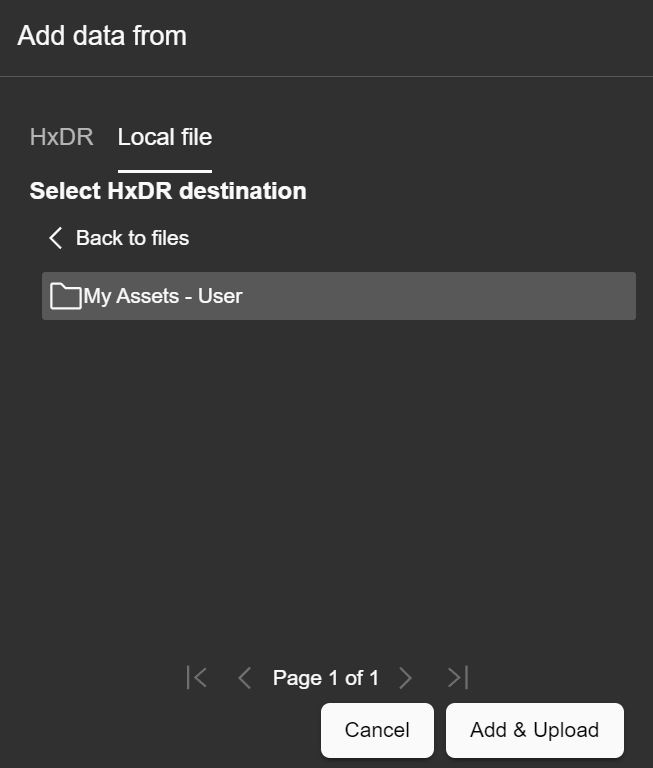
Click Next, and select the HxDR project folder that you want to upload it to.Adding local data the HxDR Platform
Click Add or Add & Upload. If the file must be processed as an HxDR asset, HxDR StartApp starts uploading it to the HxDR platform. The Layer Control drawer lists it under Currently uploading and Being processed by HxDR. You can monitor progress from there. If the asset has a georeference, HxDR StartApp knows where to place the asset, and adds it to the map. If the asset doesn't have a georeference, HxDR StartApp automatically opens the Geolocation drawer and loads previously created geolocations for the asset.
You can find your data layer under Asset Layers in the Layer Control drawer.
Center on data
If you can't see the data from a particular layer on the map, it may be outside your map view.
To center the map on the location of your data, click the Re-center icon next to the layer name in the Layer Control drawer. HxDR StartApp then moves the map's camera to make the layer data centrally visible.
Show and hide layers
If you want to hide layer data on your map, click the Eye icon next to the layer name in the Layer Control drawer. HxDR StartApp then makes that layer invisible on the map.
To make hidden data visible, click the Eye icon next to the layer name again.
Add data from the API
Add a local file
Use the AddDataManager that is created in App.tsx.
// get a file from an input with type file for example

if (isOfFormat(file.name, LOCAL_FORMATS)) {
  //after this successful call, there will be a layer created from the file on the dataManager's map
  dataManager.addLocalFile(file);
}
Upload files to HxDR
Use the AddDataManager that is created in App.tsx. Internally, the AddDataManager calls the functions from AssetPersistanceUtil.ts in the correct order with correct parameters.
// get a file from an input with type file for example

//the folder id can either be gotten by letting the user choose with `HxDRProjectsBrowser`,
//or be hard-coded from an already existing folder that the user has access to.
const folderId = "5d2288d9-3372-4933-b98d-818a4067f96d";

//listen to TRACKED_ASSET_UPDATED_EVENT events to get the up to date upload and processing state of your added files.
dataManager.on(TRACKED_ASSET_UPDATED_EVENT, () => console.dir(dataManager.trackedAssets))

if (isOfFormat(file.name, HXDR_FORMATS)) {
  //after this successful call, the dataManager will track the upload and processing of the file.
  dataManager.uploadHxDRFile(file, folderId);
}
Add your HxDR assets
Use the GeolocationSupport that is created in App.tsx.
//fetch the processing state of an asset with known id & name
const {state, subStates} = await getAssetProcessingState(
    getApolloClient(getResolvedBearerToken()),
    groupedAssetId
)
const asset = {groupedAssetId, name, state, subStates};

if (asset.state === READY) {
  //after this successful call, if the asset is georeferenced, its artifact layers are added to the map.
  //If the asset is not georeferenced, the asset is added to the geolocationSupport and the already existing
  //geolocations (called georeferences on the HxDR side) are added by default.
  addAssetToMap(map, asset, geolocationSupport);
}

//You can also add an asset immediately to the geolocationSupport, but this is only guaranteed to work correctly with
//non-georeferenced assets.
geolocationSupport.addAsset(asset.groupedAssetId);

//Once an asset is tracked by the geolocation support, you can start the user interaction where it will be placed on
//the map
const geolocationAsset = geolocationSupport.assets[0];
geolocationSupport.startGeolocationCreation(geolocationAsset);